So, now the works begins. I'm going to give you a little description of how I prepare the tomatoes for canning. Now, there are many ways to can tomatoes. I would recommend have a Ball Blue Book in your kitchen at all times. It's my favorite guide to all things canning! The Blue Book may have something similar to what I'm going to tell you about but I'm not sure. I am going to tell you about the way I like to process my tomatoes. I learned to do it this way through experimenting the last couple of years.
Of course, we begin by washing everything off and removing any stems that remain.
Step 1: Bring a large pot of water to a boil. Place a few tomatoes in the water at a time. I think "technically" you are supposed to leave them in for about 30 seconds. I don't really time mine. I just keep everything moving at a pretty good pace and it all seems to work out. If the tomatoes split while in the water that's not a problem.
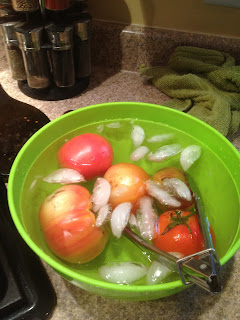
Step 2: Place tomatoes in a pan of ice cold water to stop them from cooking. You will have to replace the water and ice frequently as the tomatoes will heat it up in no time!
Step 3: Peel tomatoes and core them. The peels should just slide right off without much work on your part. If the skin did not split on it's own while in the boiling water, I just take a sharp knife and slice lightly across the bottom of the tomato. Slip the skins into your compost container and cut out the core and any bad spots that may be on your tomato.
Step 4: Place all of your tomatoes in a large stock pot. Do NOT add water! Just fill it up until it's almost full and set your temperature to Med/High and let it cook. This is NOT going to be a short process! I wander through and stir the tomatoes whenever I think about it and adjust the temp up or down depending on how hard it is cooking. You want it to just barely boil. I cook it down until it is about 1/3 of it's original volume (usually 4-5 hours). This cooks the water out so you are not canning 1/2 water and 1/2 tomatoes.
 |
| Ok, I had mine too full and had to add a 3rd pot |
 |
| Front pot blended the back pot was not |
I have an easier way of processing your fresh tomatoes. I hope to have it ready for you in the next day or two and then we will go to How To Can.


No comments:
Post a Comment